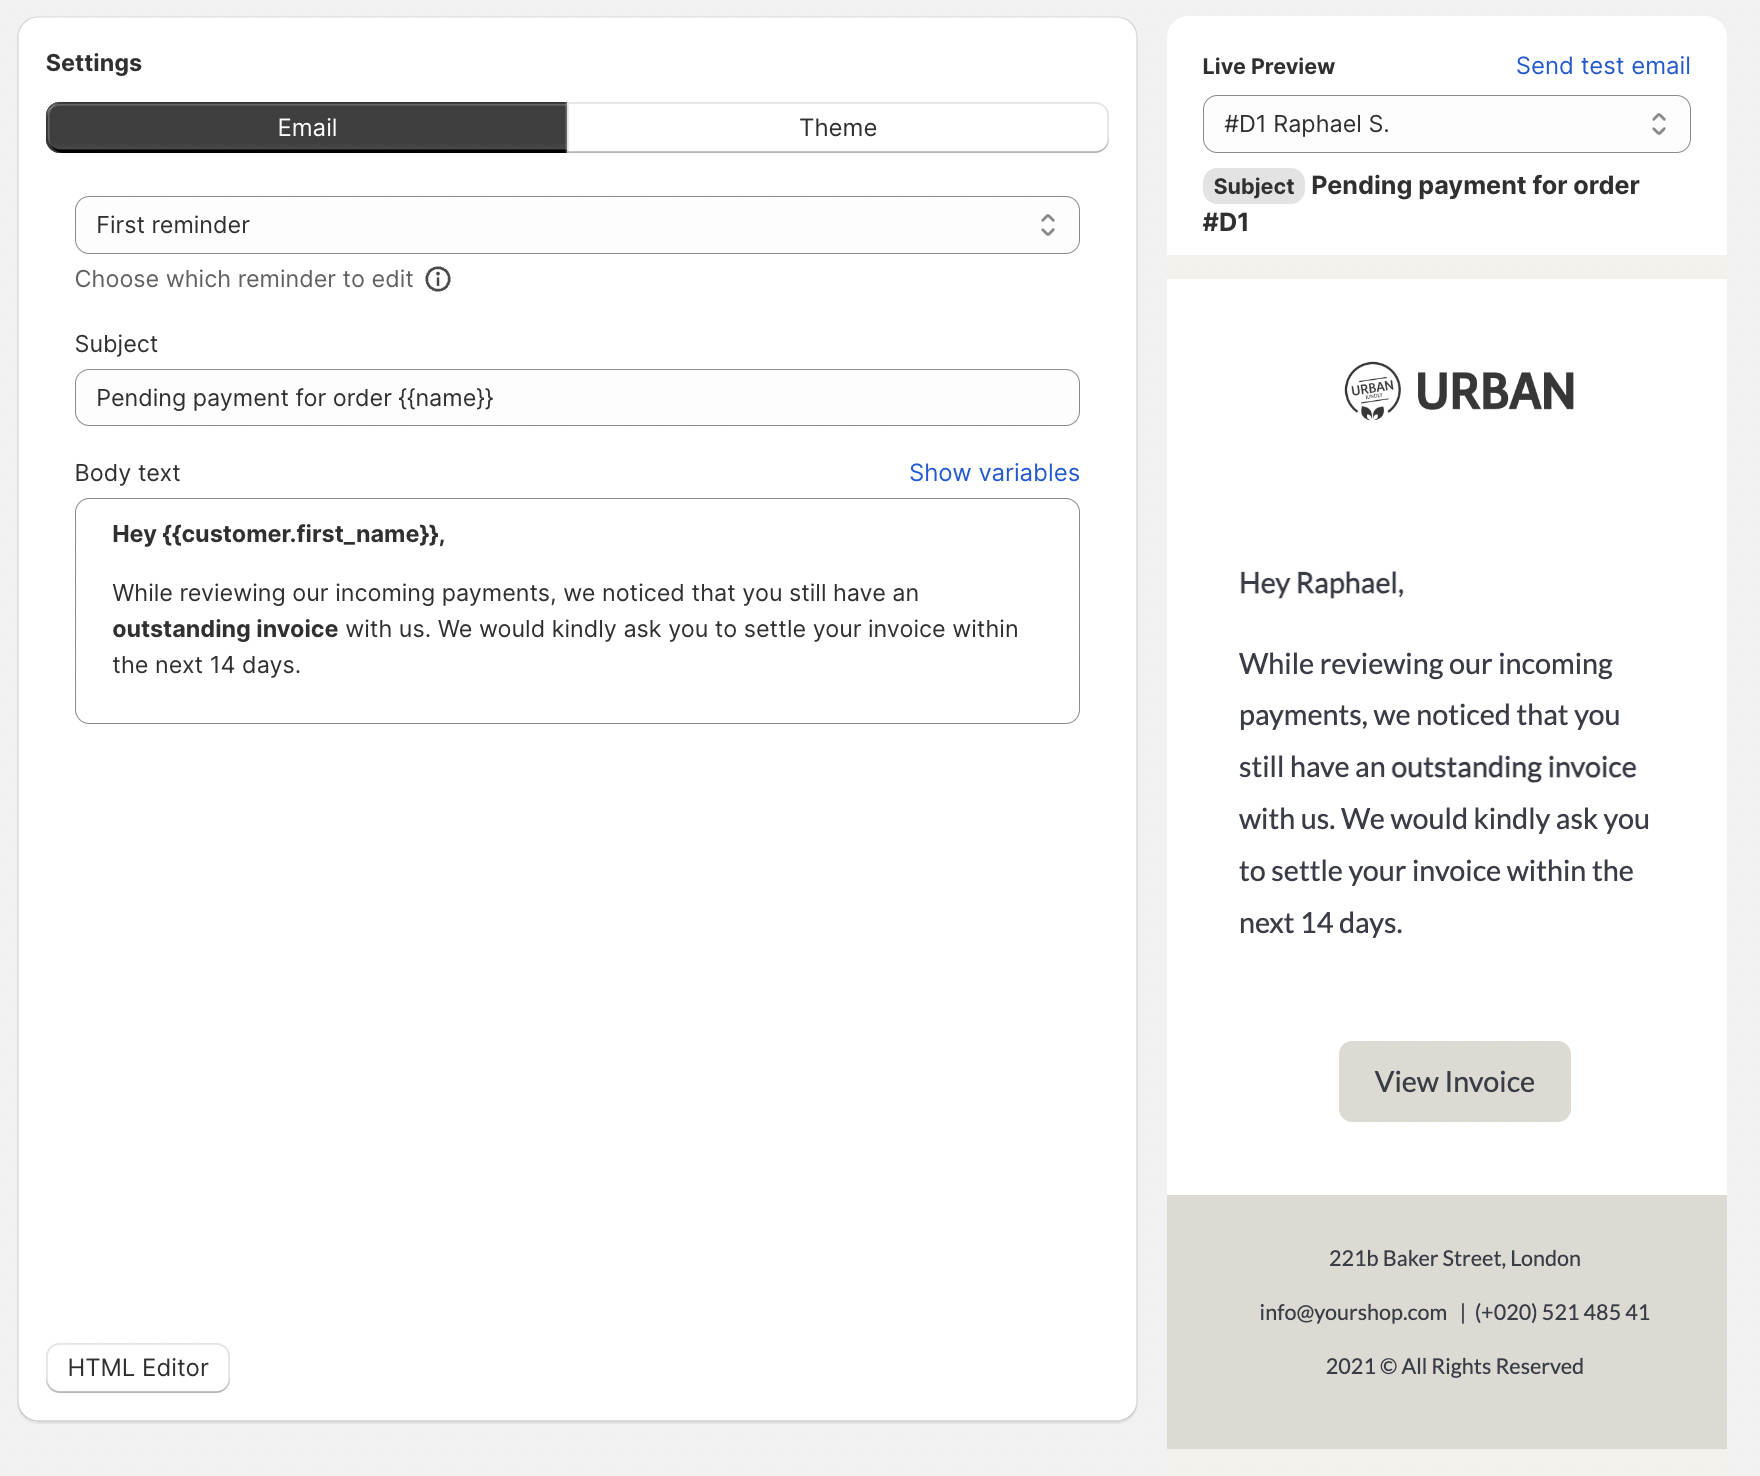
The template editor is separated into two sections. Left the settings section and on the right the live preview where you see your template changes in real time. In the settings section, you find two main tabs "Email" and "Theme".
Entering the Template Editor
As you enter the template editor you can see the settings page on the left and the live preview on the right. The live preview shows all your changes in real time so you can always check your changes right away without having to save them.
Live Preview
Preview a Real Order
In the live preview section you can select an order of your shop to see how the reminder text would look like for this customer. All variables will be filled in with the data of this order.
Send a Test Email
In addition to the live preview you can also send yourself a test email to see how your email looks like on different devices and email clients like Apple Mail, Outlook, Gmail, ...
Settings
Email Settings: Changing Email Subject and Body Text

1 Choose reminder to edit: Select the reminder you like to edit. You can edit the body texts and subjects of reminders individually. The design on the other hand is the same for every reminder as we believe they should have a common thread.
2 Subject: Adjust the subject of your selected reminder email
3 Body text: Adjust the body text of your selected reminder email.
Using Variables
Use variables in your subject and body text to make your email feel and look more personal and professional.
To view a list of all possible variables click the "Show variables" link in the top right corner of the body textfield.
Formatting Text in the Body Text
Format text by highlighting the text you like to adjust. Choose from options: bold, italic, underlined, left aligned, center aligned or right alined.
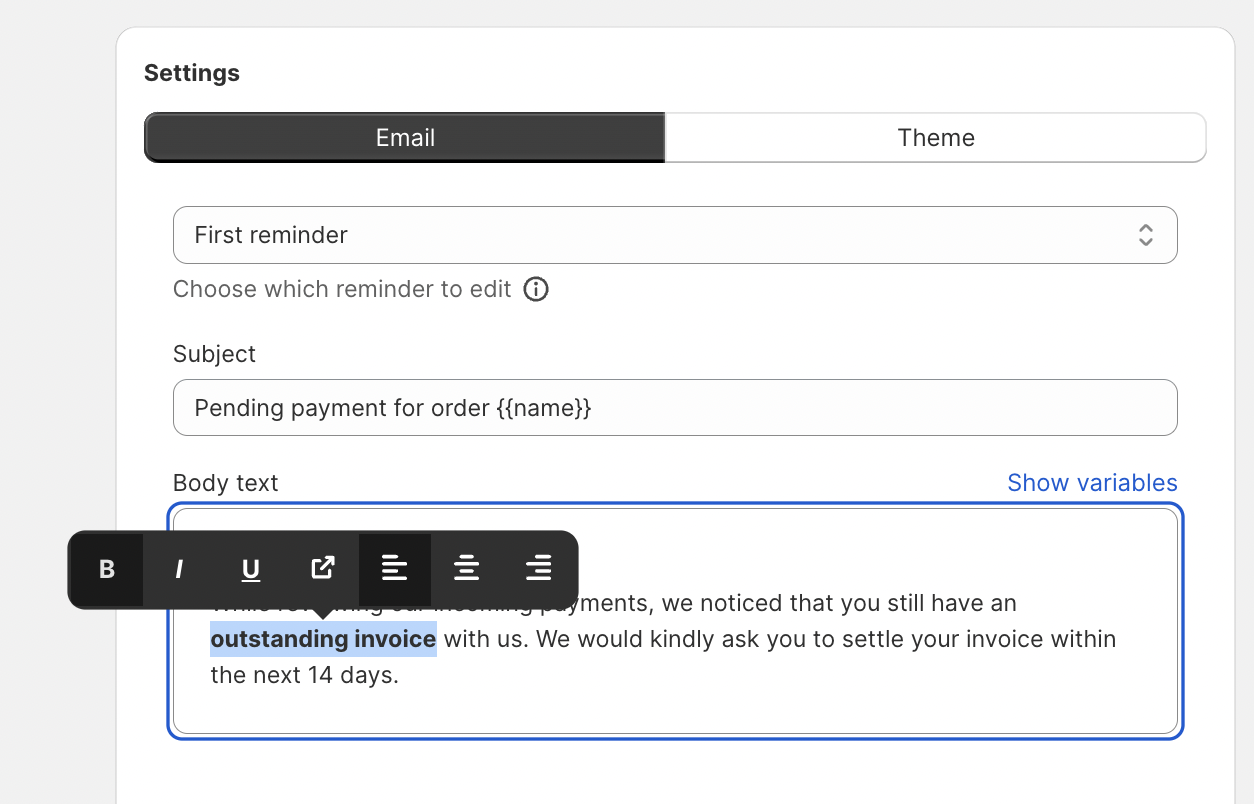
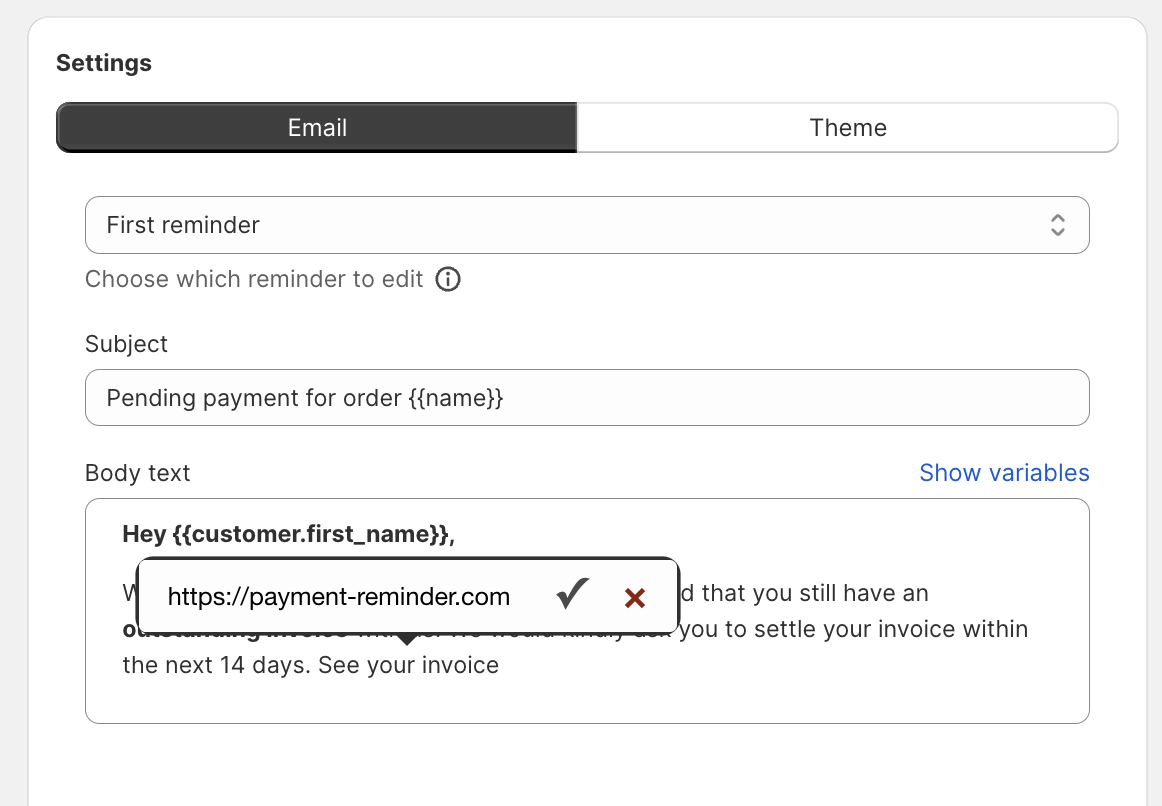
Add a link by highlighting the text you like to add the link to. Choose link icon and enter your URL starting with "https://".
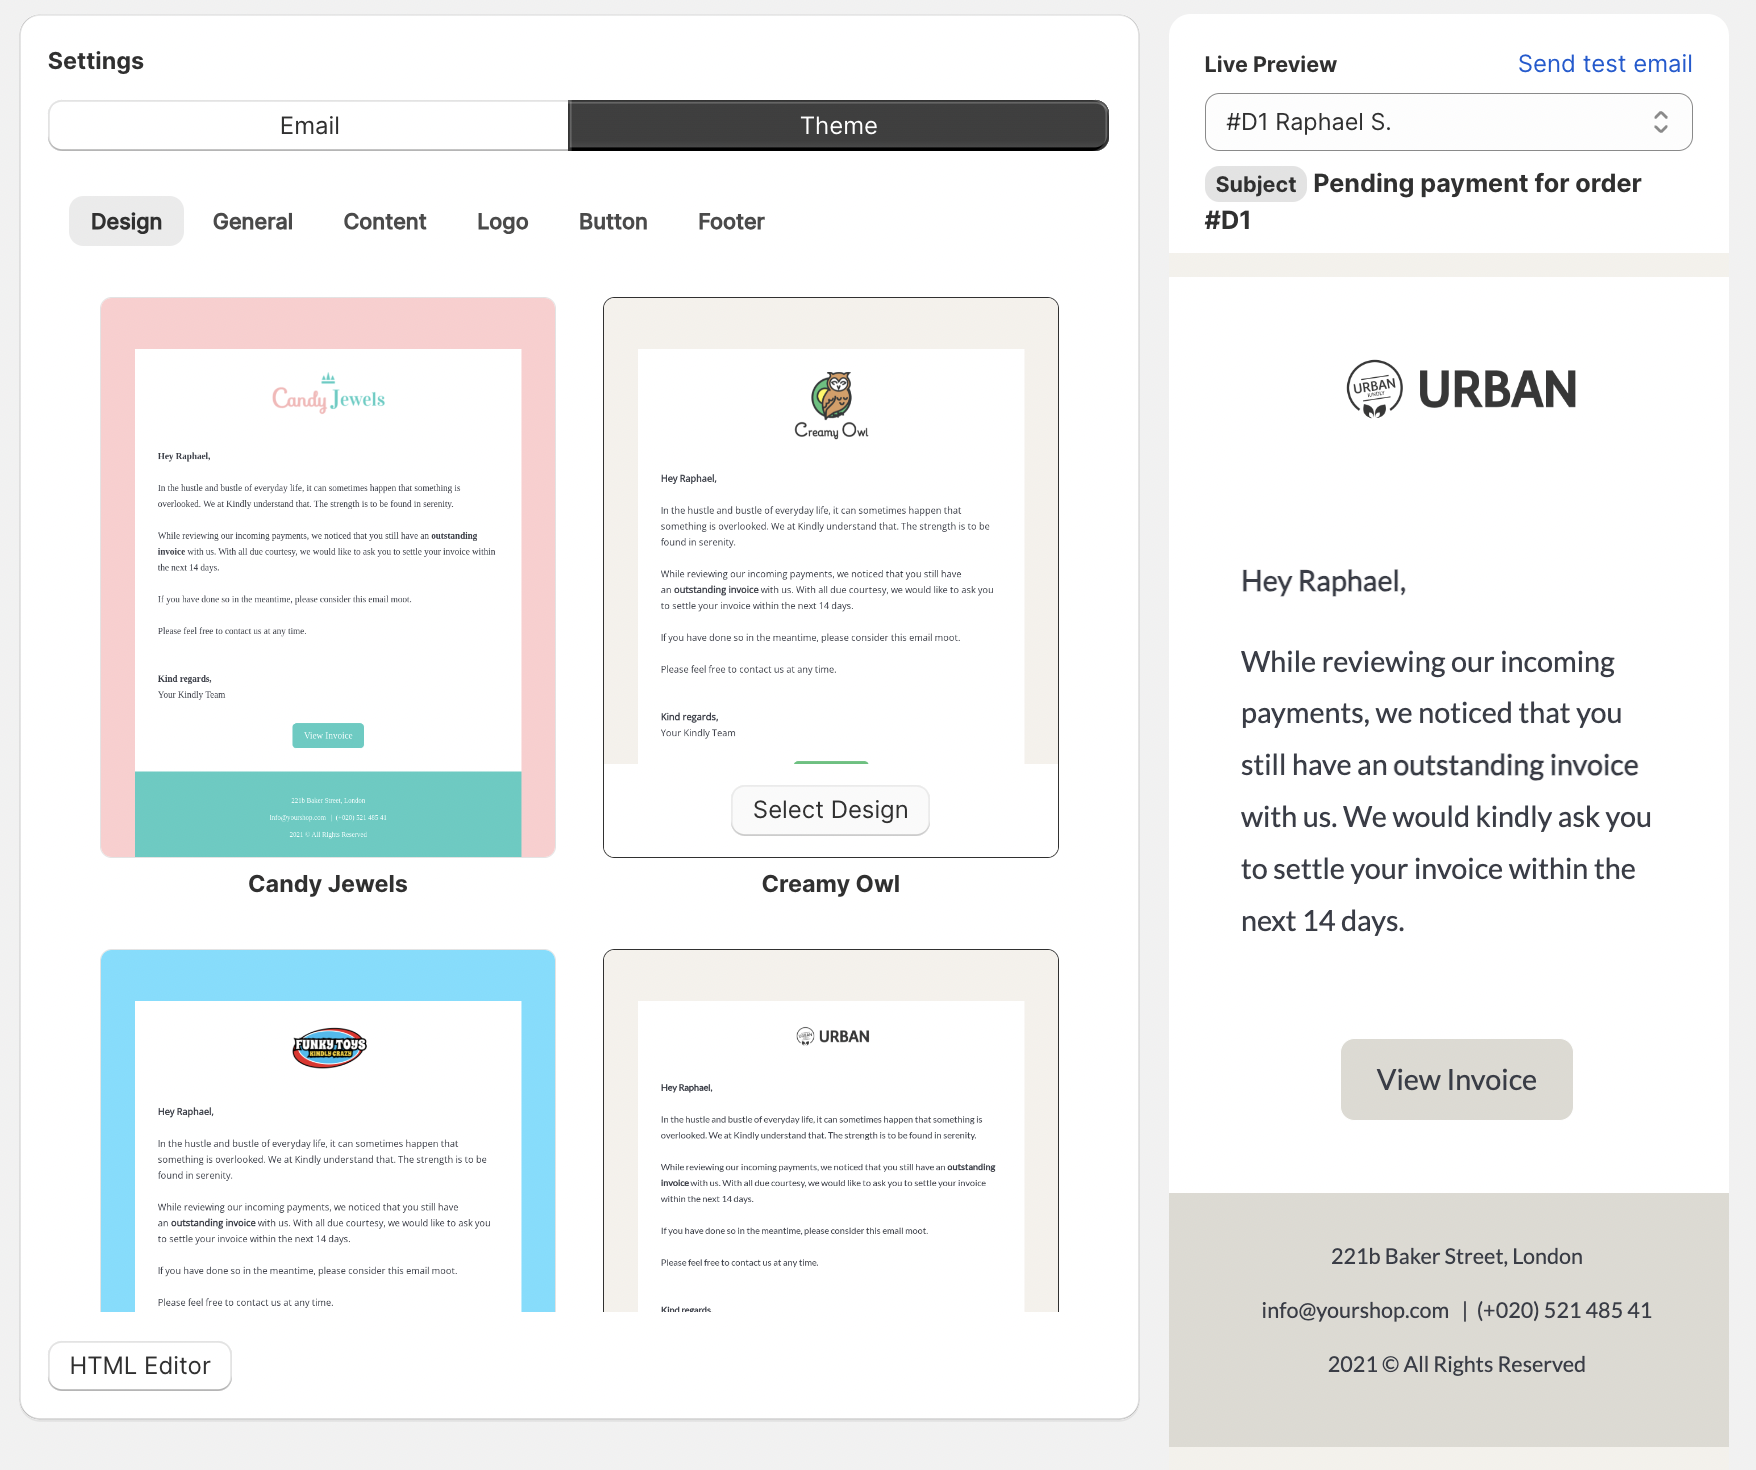
Theme Settings: Changing the design, font, logo, button and footer
Predefined Design Templates
For a quick start choose one of our predefined design templates and customize it to your liking. Notice how the body text you set up stays the same. Only the design changes.
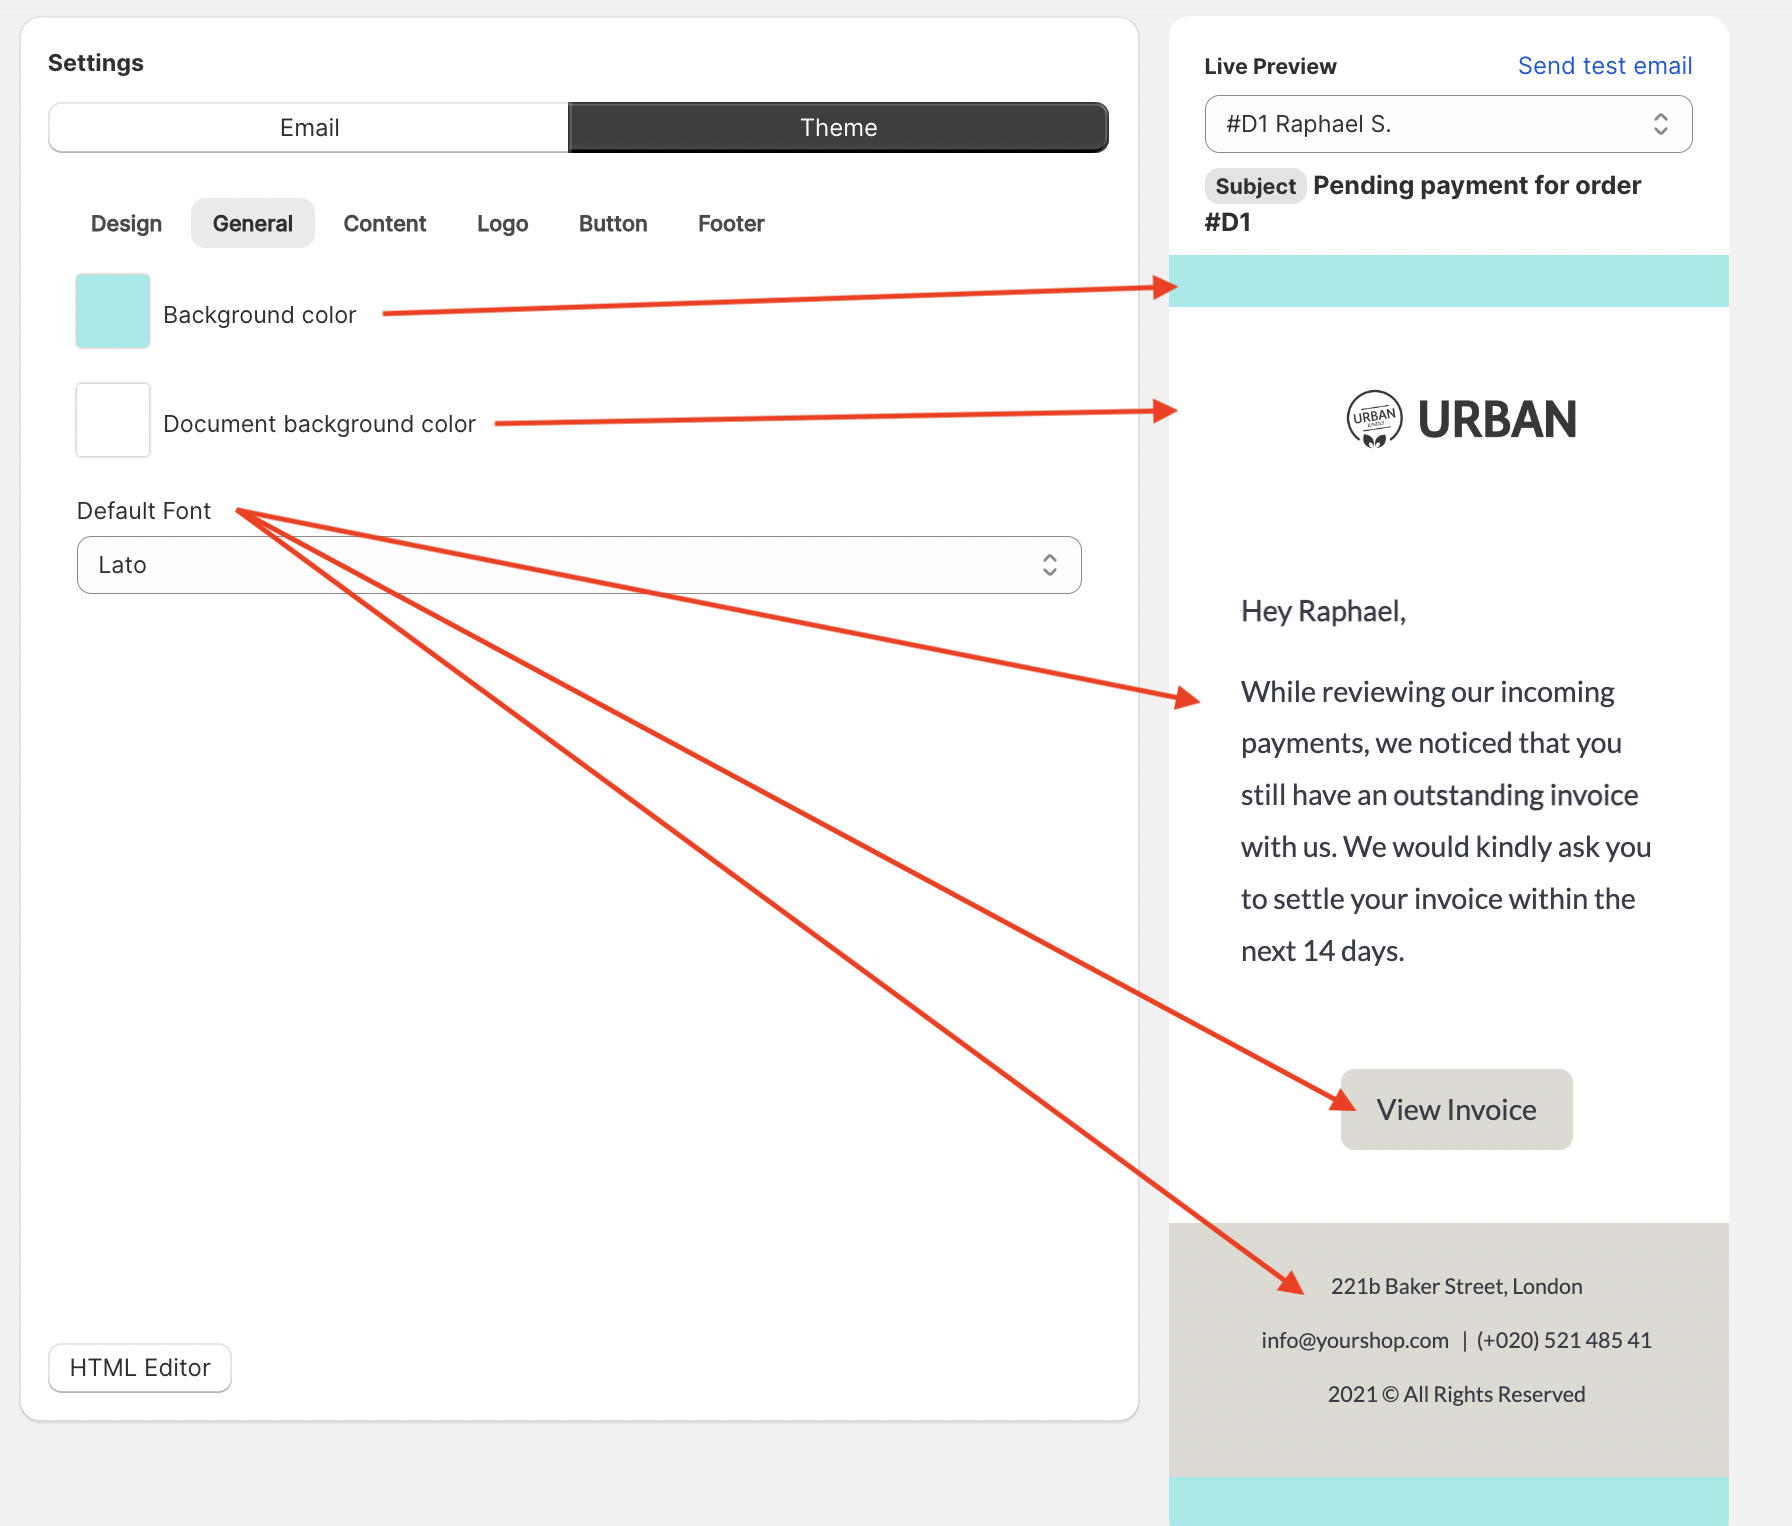
General Theme Settings
- Background color: Changes the color of the background
- Document background color: Changes the color of the document background
- Default font: Changes the font of all texts globally. You can adjust the font of specific texts individually in each section. These specific changes are prioritized and therefore not overwritten by the default font setting. E.g. when changing the font of the button to Arial this will not be overwritten by the default font.
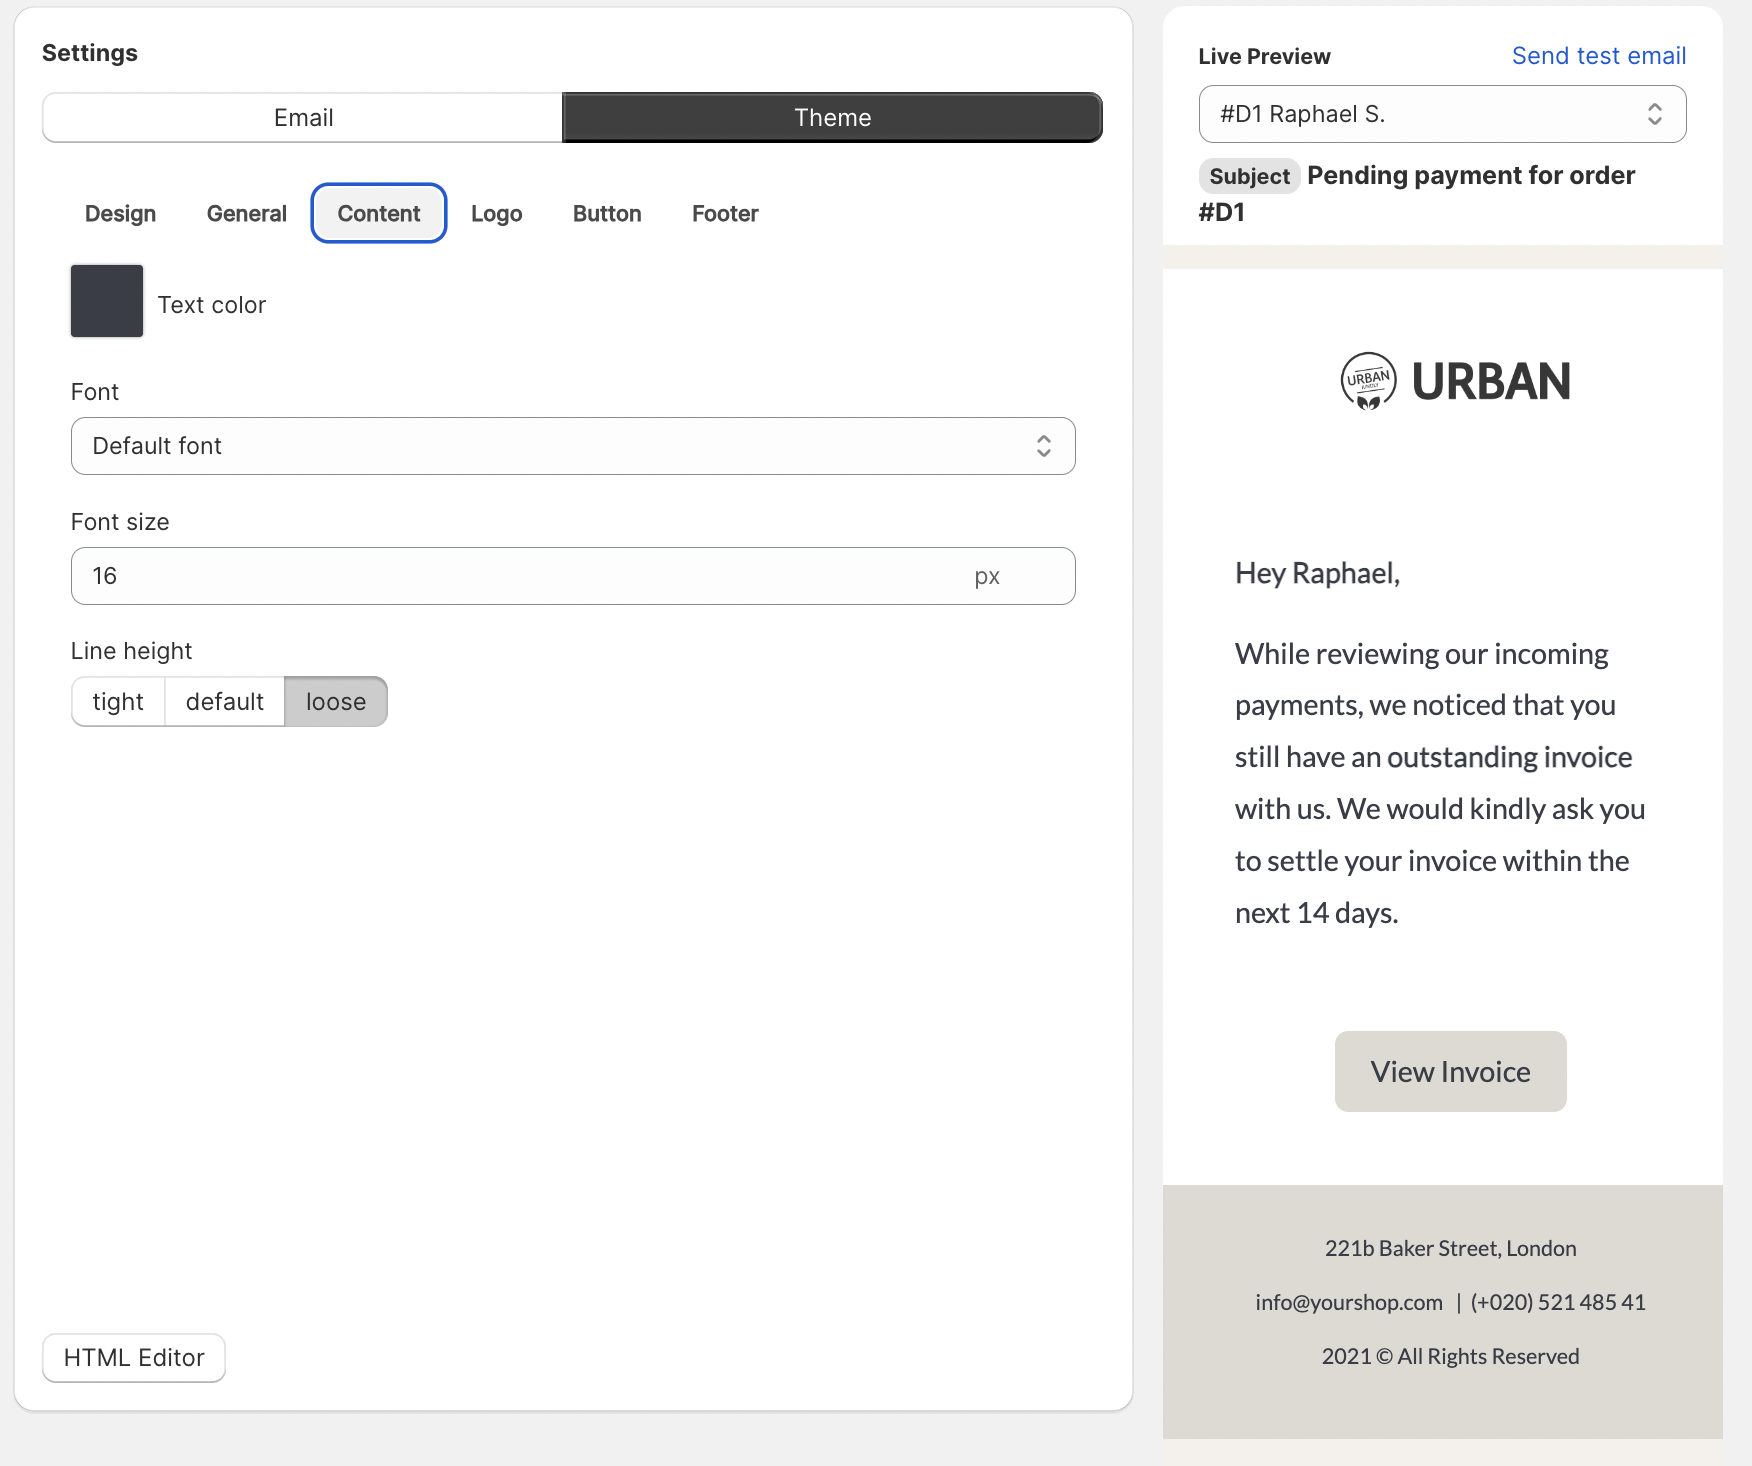
Changing the Content Style
Make adjustments to the following content style options.
- Text color
- Font family
- Font size
- Line height: Defines how tight or loose lines are to each other
Adding a Logo
Add your company logo to your email reminders.
URL: Click the Logo field to upload your own logo.
![]()
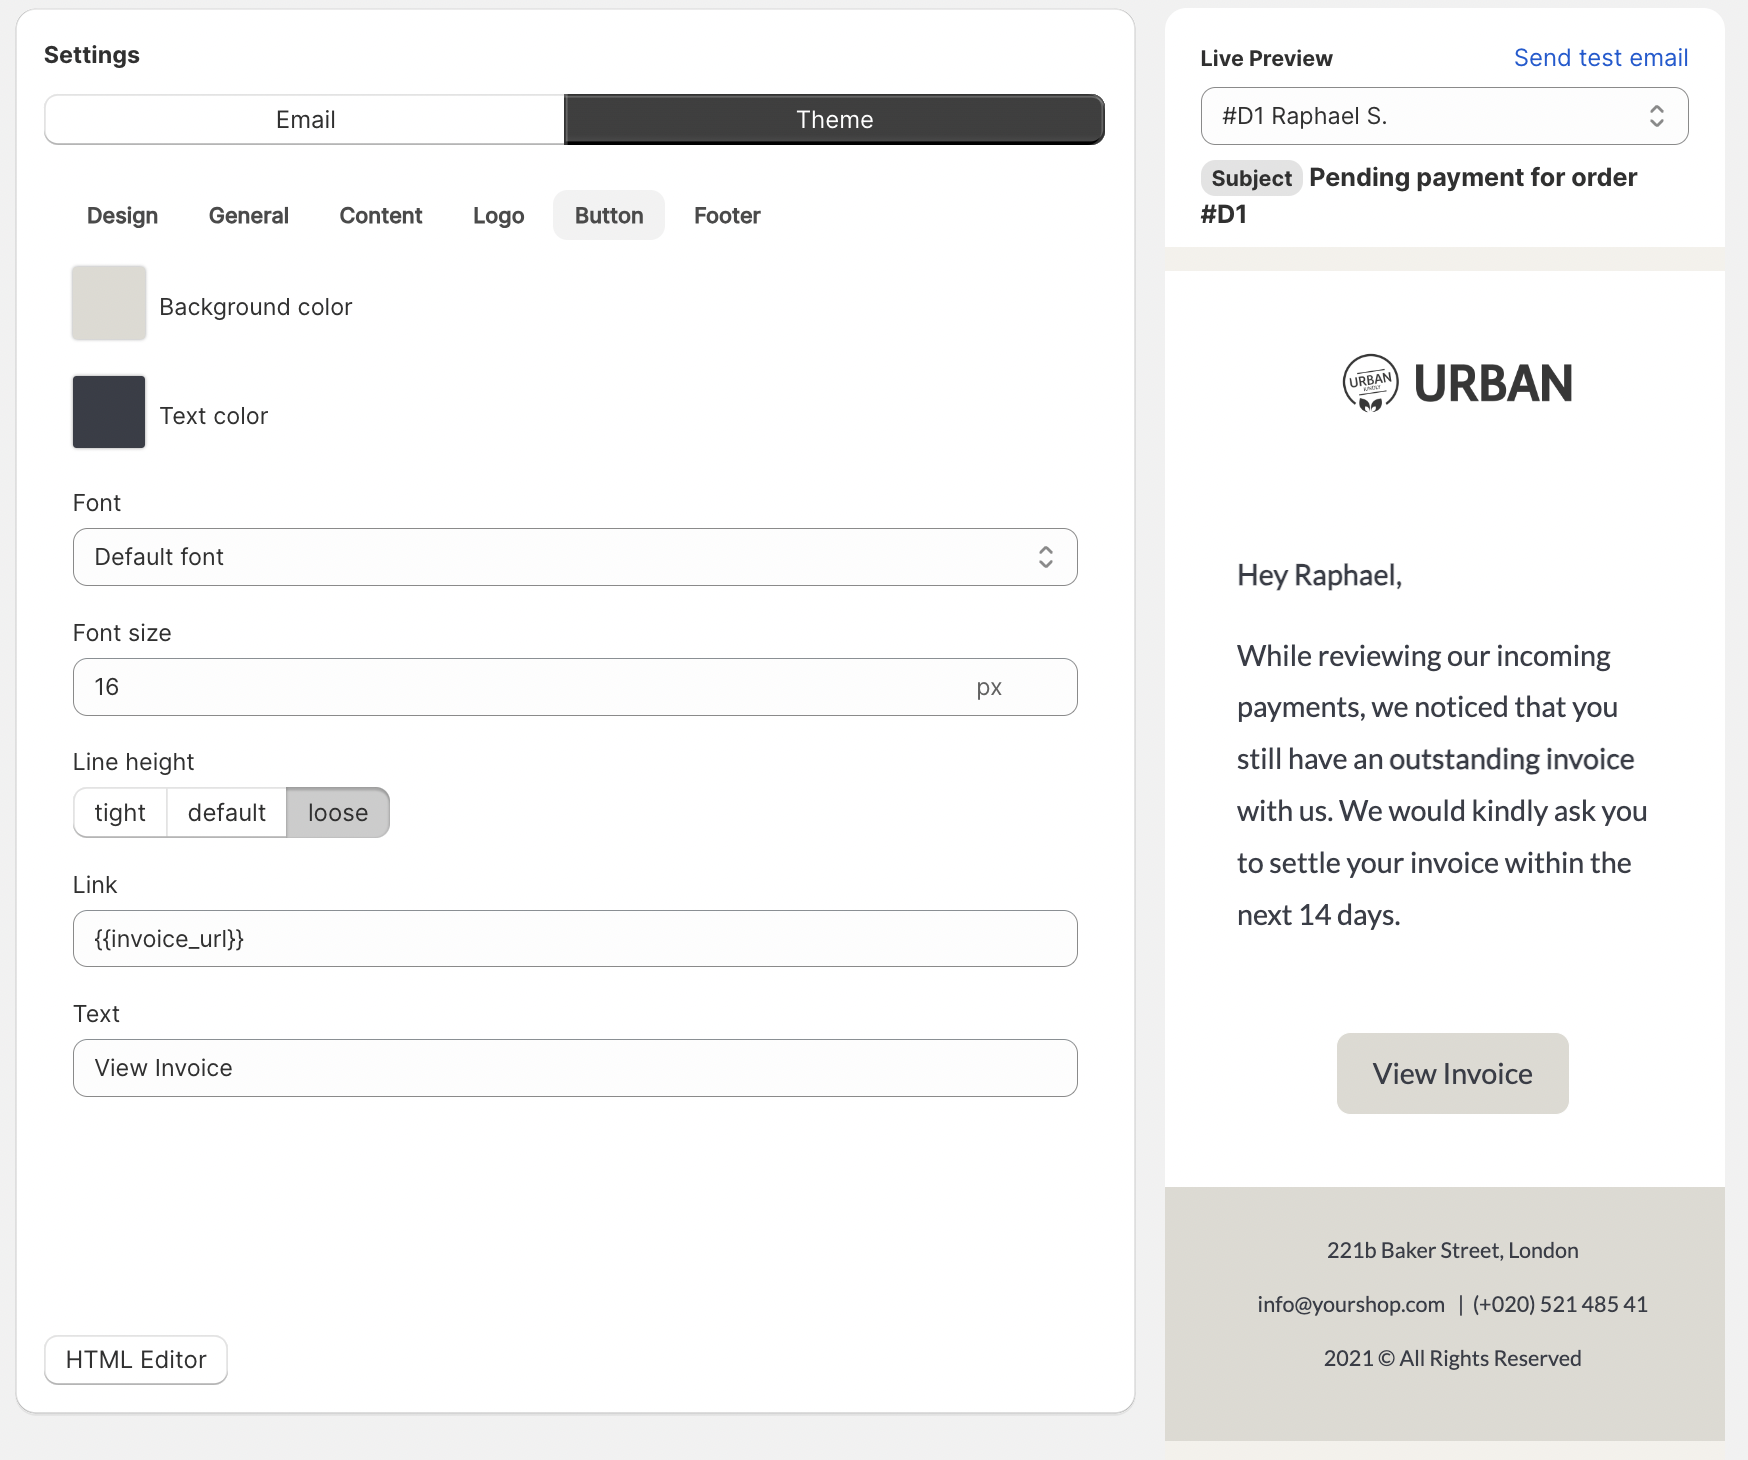
Change the Button Style
- Background color: Changes the button background color
- Text color: Changes the button text color
- Font family: Changes the font family of the button text
- Font size: Changes the font size of the button text
- Line height: Changes the line height of the button text. Can be useful to make the button appear bigger
- Link: Add a link to the button. You can either use a standard URL or variables like {{ invoice_url }} or {{ checkout_payment_collection_url }}.
- Text: Changes the button text
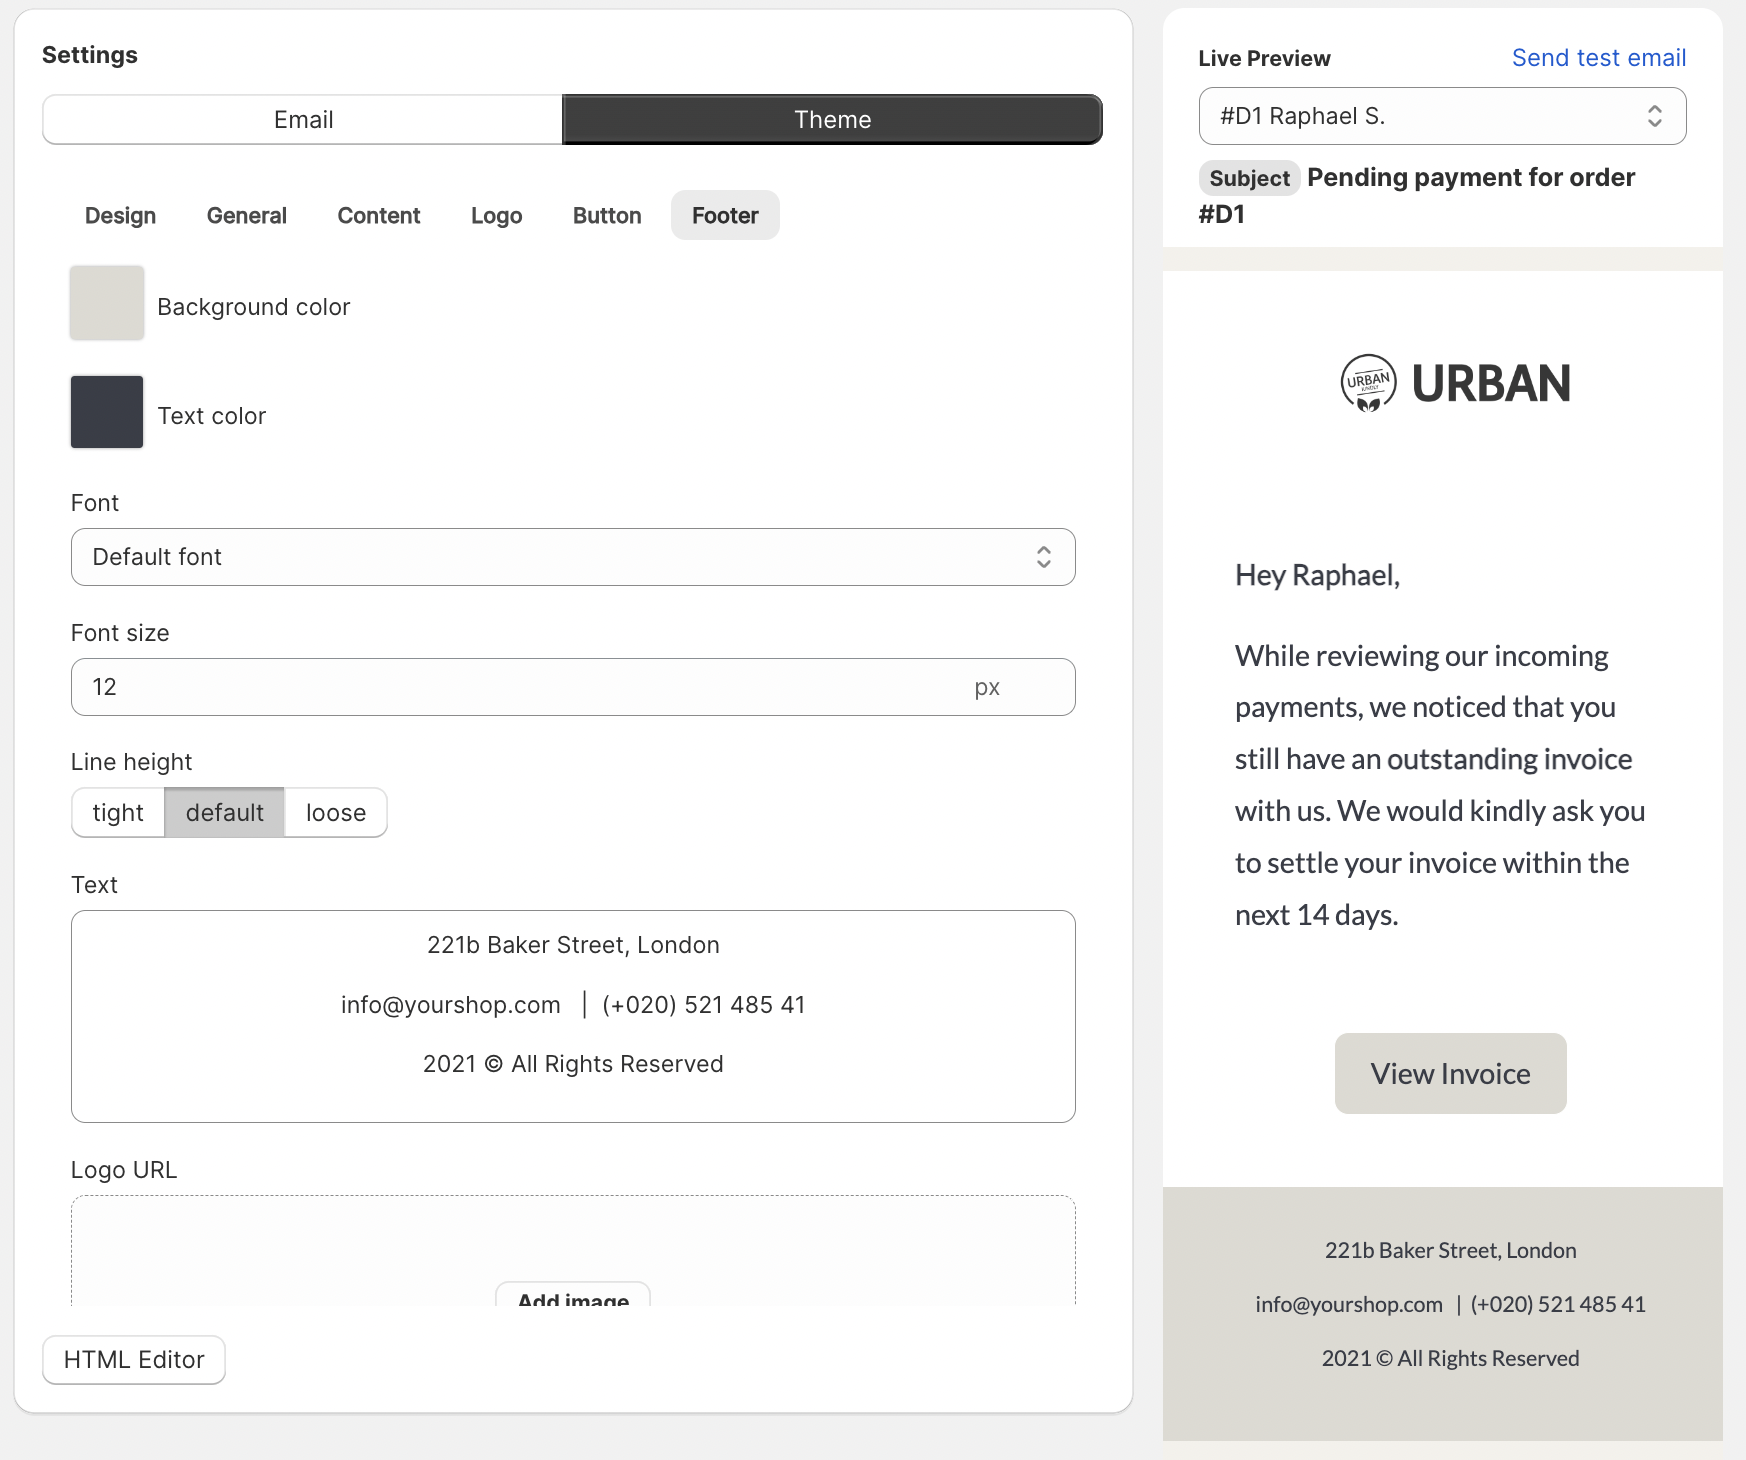
Change the Footer Style
See all the style options you have for the email footer
- Background color: Changes the footer background color
- Text color: Changes the footer text color
- Font: Changes the footer text font
- Font size: Changes the footer font size
- Line height
- Text: Add text to your footer. The text in here can also be formatted. Highlight the text you like to adjust and choose the format in the hovering menu.
- Logo URL: Add a logo to your footer.
- Logo size
- Logo Alt text
- Logo Title
HTML Editor
If you prefer to code your own email template you can easily use our HTML editor. Switch to the HTML editor by clicking the "HTML Editor" button on the bottom left corner of the basic template editor. This is also where you can go back once you have switched.

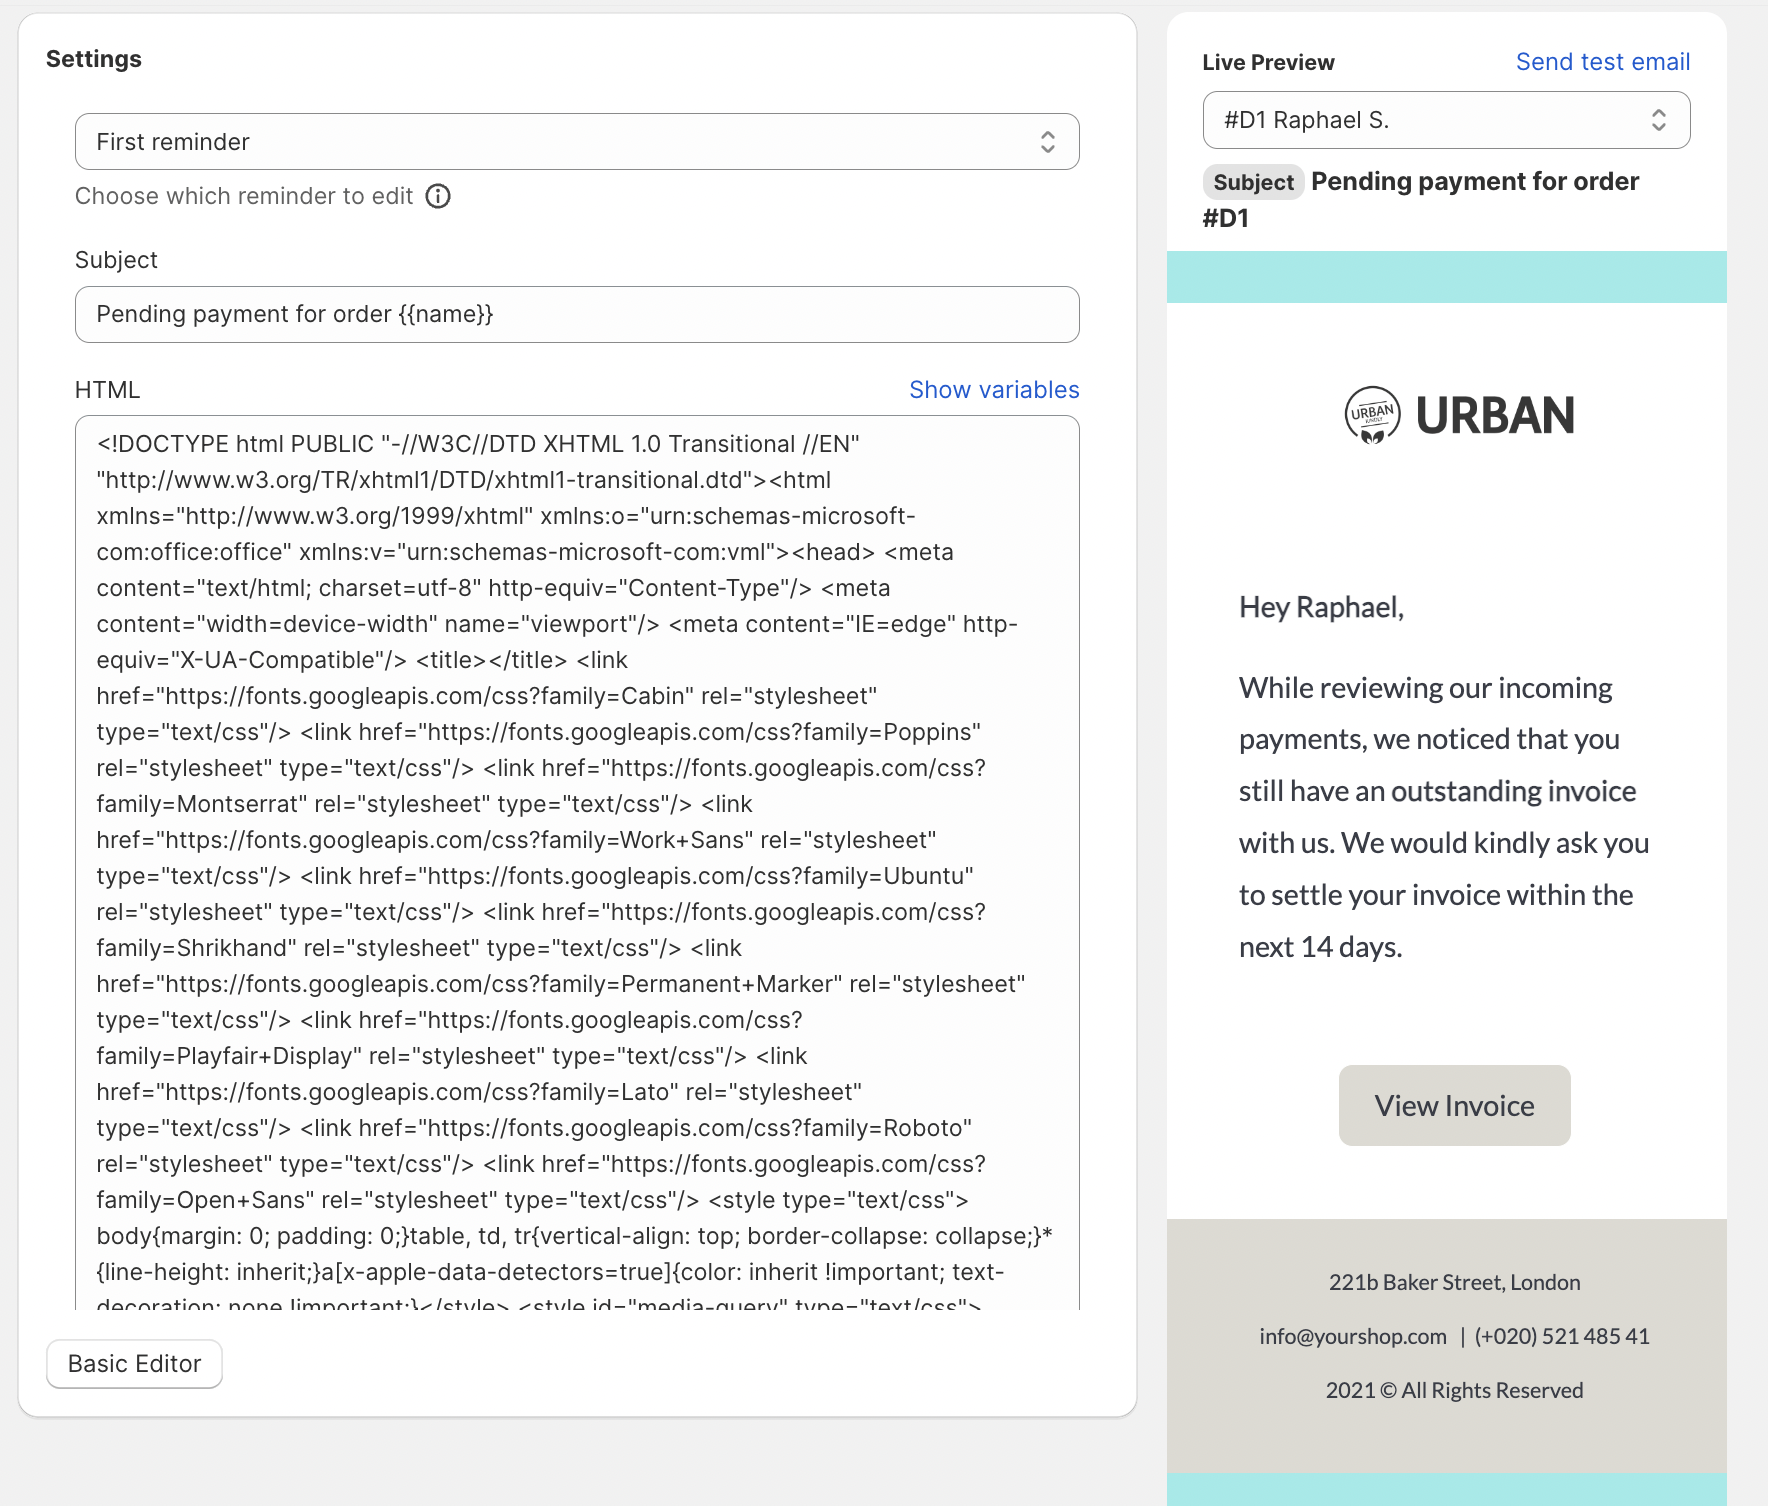
Settings (HTML editor)
1 Choose reminder to edit: Select the reminder you like to edit. You can edit the subjects and HTML of reminders individually.
2 Subject: Adjust the subject of your selected reminder email
3 HTML: Adjust the HTML script of your selected reminder email.
Using Variables
Use variables in your subject and HTML script to make your email feel and look more personal and professional.
To view a list of all possible variables click the "Show variables" link in the top right corner of the HTML textfield.